How To Install Tile Flooring - Step By Step Guide
Figuring out how to lay floor tiles can be easy sounding but can be tough as an old boot! So, a few things need a touch of planning. Tile can be available in a wide assortment of styles, tones and examples.
See Steps for more data on the most proficient method to do DIY tile format with insignificant experience and loads of tomfoolery.
Steps To install Tile Flooring
It doesn’t matter whether you’re doing it yourself or hiring an expert to do the job, this steps to install tile flooring will help you complete your project with ease!
Step.1: Pick Your Favourite Tiles and Prepare the Space:
Take shelter of these tips to begin:
-
Try to know anything you can about the kinds of tiles accessible before you choose.
-
Also, there comes your subfloor!
-
The ideal subfloor ought to have the option to help tile, mortar, grout and furniture when the venture is finished.
-
It would be ideal for it to be spotless, dry and level.
-
Assess your subfloor and right any plunges, breaks or lopsided spots that will make your tile clasp or not introduce as expected.
-
Assuming that you have a pressed wood or OSB subfloor, introduce a water-safe concrete patron board as your underlayment.
-
Concrete subfloors normally don't need a benefactor board.
-
Measure the region to guarantee you have sufficient tile.
Step.2: Assemble Tools and Materials:
List Of Tools Which Are Required For Tile Installation:
-
Straight edge
-
Trowel
-
Drill/driver
-
Saw
-
Measuring Tape
-
Tile cutter
Also, try to know various things like the scoop size, mortar type and other tile setting materials that are suggested by your tile's producer.
Step.3: Layout Preparation:
-
While tiling a, draw a format of your completed tile plan straightforwardly onto your subfloor.
-
The format's lines show you where to begin laying floor tiles and assist with guaranteeing the tiles are appropriately focused in the room.
-
Format lines should be square, if not, you will wind up with odd-moulded tiles on the dividers.
-
The most ideal way to guarantee square lines is to make a story arrangement by drawing the dividers of the room as precisely as conceivable on a sheet of matrix paper.
-
Incorporate entryways and floor deterrents, for example, robs and installations as well as any tile edging or trim.
-
Track down the middle mark of the room: Measure the four dividers for their midpoints.
-
Snap two chalk lines, one from the midpoints of two inverse dividers, and one more from the midpoints of the other two dividers.
-
The room's middle point is where the lines meet. And make sure that the chalk lines are square.
-
Measure the inclining space between every one of these two places.
-
Then Test the format you've planned by doing a trial run with your tiles.
-
Lay a solitary half-line of floor tiles in the two headings without mortar, beginning at the middle point and working outward.
-
A few tiles have directional bolts on the back. So, you should keep these bolts guiding in a similar course toward guarantee design arrangement.
- Embed spacers between the tiles. Stop when there isn't adequate space for a full tile.
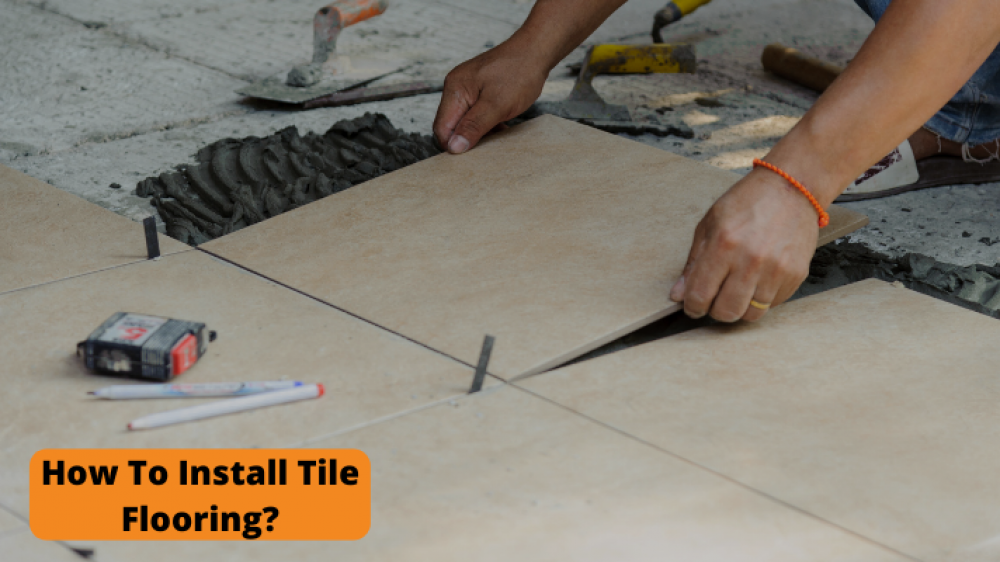
Step.4: Test the Mortar and Lay the Tiles:
-
Toward the start of your tile floor establishment, consistently do a test to guarantee the consistency of the mortar is suitable.
-
Blend your mortar in a huge can utilizing a drill with a blending paddle, following the bundle bearings.
-
Lay the tile level and afterwards with gentle tension. Pull the tile up and really take a look at the rear of the tile. It ought to be totally covered with a mortar.
-
Whenever you've affirmed you have the right mortar consistency, re-lay your most memorable tile.
-
Ensure it lines up with the chalk lines at the design's middle and that it is completely squeezed once again into the mortar.
-
Set your subsequent tile by adjusting the edges and corners then pivoting it down.
- Then likewise Apply Mortar in Sections.
Step.5: Get done with Laying Full Tiles:
-
Get done with laying tiles in your most memorable quadrant.
-
You'll then be left with the space between those tiles and the divider where cut tiles are required.
-
Wrap up laying all full tiles in your other three quadrants and let the mortar solidify.
Step.6: Apply the Grout:
-
When your tile floor is finished, now is the ideal time to apply the grout. Grout occupies the spaces between the tiles.
-
Like paint, grout can arrive in an assortment of various choices that match or supplement your tile.
-
After the grout is prepared, spread it in clearing circular segments with the elastic grout float held at a shallow point.
-
Press the grout into the joints, filling them totally. After the grout is spread, eliminate the abundance with a grout float held at a good angle.
-
Fixing your grout is vital for keeping grout lines spotless and looking like new.
-
Grout sealer gives unbeatable, imperceptible insurance for grout.
Step.7: Cleaning:
If you have any leftover adhesive, be sure to clean it up with soap and water!
Pro Tip by Expert : Be sure not to install your tiles in a pattern. This will create an uneven look that can't easily be fixed by cutting out individual pieces.
So above are the steps to install tile flooring and i hope you understood it. I hope this guide will help you for you project and save your money and time. If you have any quarry about it then feel free to contact us, Our experts will provide you the best solution. Thank You.
Article Updated:- June 30, 2022
Read More Articles:
1. How To Clean Bathroom Tiles?
2. How To Choose Perfect Tiles For Your Home?
3. How To Import Tiles From India?